Compatibility:
WebSite X5 Pro
If you want to sell online, one of the first things you need to do is prepare your Product Catalog. Customers need to be able to find the products they are looking for easily and access all the information they need to decide what to buy.
With WebSite X5, you can create categories and subcategories, add products, and define a name, description, price, images, and other settings for each one. The catalog data is then used to present the items in your store, for example in Product Cards and Product Pages.
In this guide, we will look at how to:
- Organize the catalog into categories
- Create and configure a new product
- Add images and videos to a product
- Hide or remove a product
How to organize the catalog into categories
Organizing products into categories makes them easier for you to update and manage, and easier for customers to find and buy. Categories group the products in your store. If a group contains many different items, you can divide it further into subcategories: for example, within "Clothing", you could create "Men", "Women", and "Children".
- Go to Step 1 - Settings > Shopping Cart > Products.
- To create a category, click New Category, type a suitable name to identify it, and press Enter or click outside the label to confirm.
- To add a subcategory, first select the category that will contain it, then click New Category again.
- To change the order of the categories, use the relevant controls or drag them to the desired position.
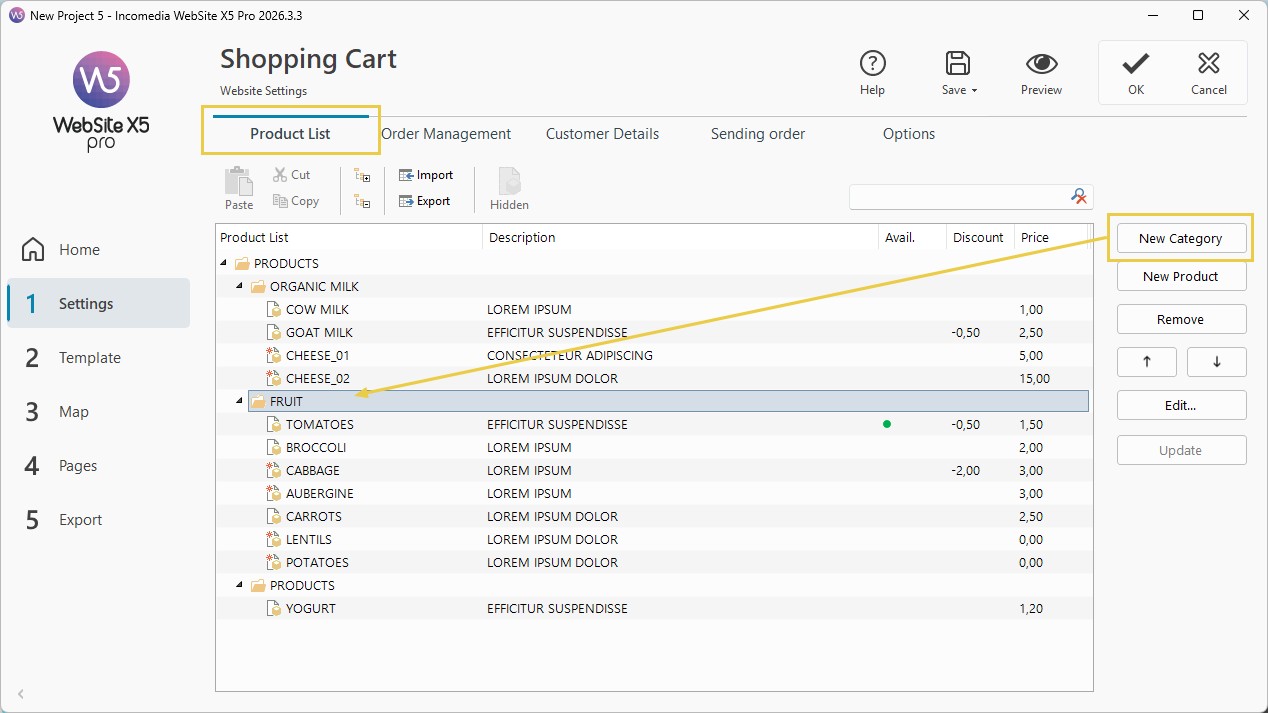
Categories are containers: you do not need to define them all before you start adding products. You can add and reorganize categories as your catalog grows.
How to create and configure a product
Once you have created the appropriate category, you can add your first product. The information you enter for the product is used in Product Cards and, if you have enabled them, Product Pages. It is therefore worth preparing text and images with what customers will see in your store in mind.
- Select the appropriate category or subcategory and click New Product to open the Product Settings window.
- In the General section, enter the product Name and a short description.
- If you need help writing the description, you can use MagicText, the AI assistant for generating text content. Click the
 button, describe the text you want and click Create text: MagicText will write the description for you.
 - If you use an SKU Code, enter it in the corresponding field. The code is not displayed in the store, but it can be used to search for the product both online and in the WebSite X5 workspace.
- Set the Price without worrying about the currency: you can set it for the entire store (see How to set the store currency?).
- Apply VAT by selecting the appropriate option (see How to set up and manage VAT in your store?).
- If you want the product you are working on to display the "New Product" ribbon, enable Highlight the Product as "New" (see What are Product Cards and how can you customize them?).
- If customers must purchase at least a certain number of units, also set the Minimum order quantity.
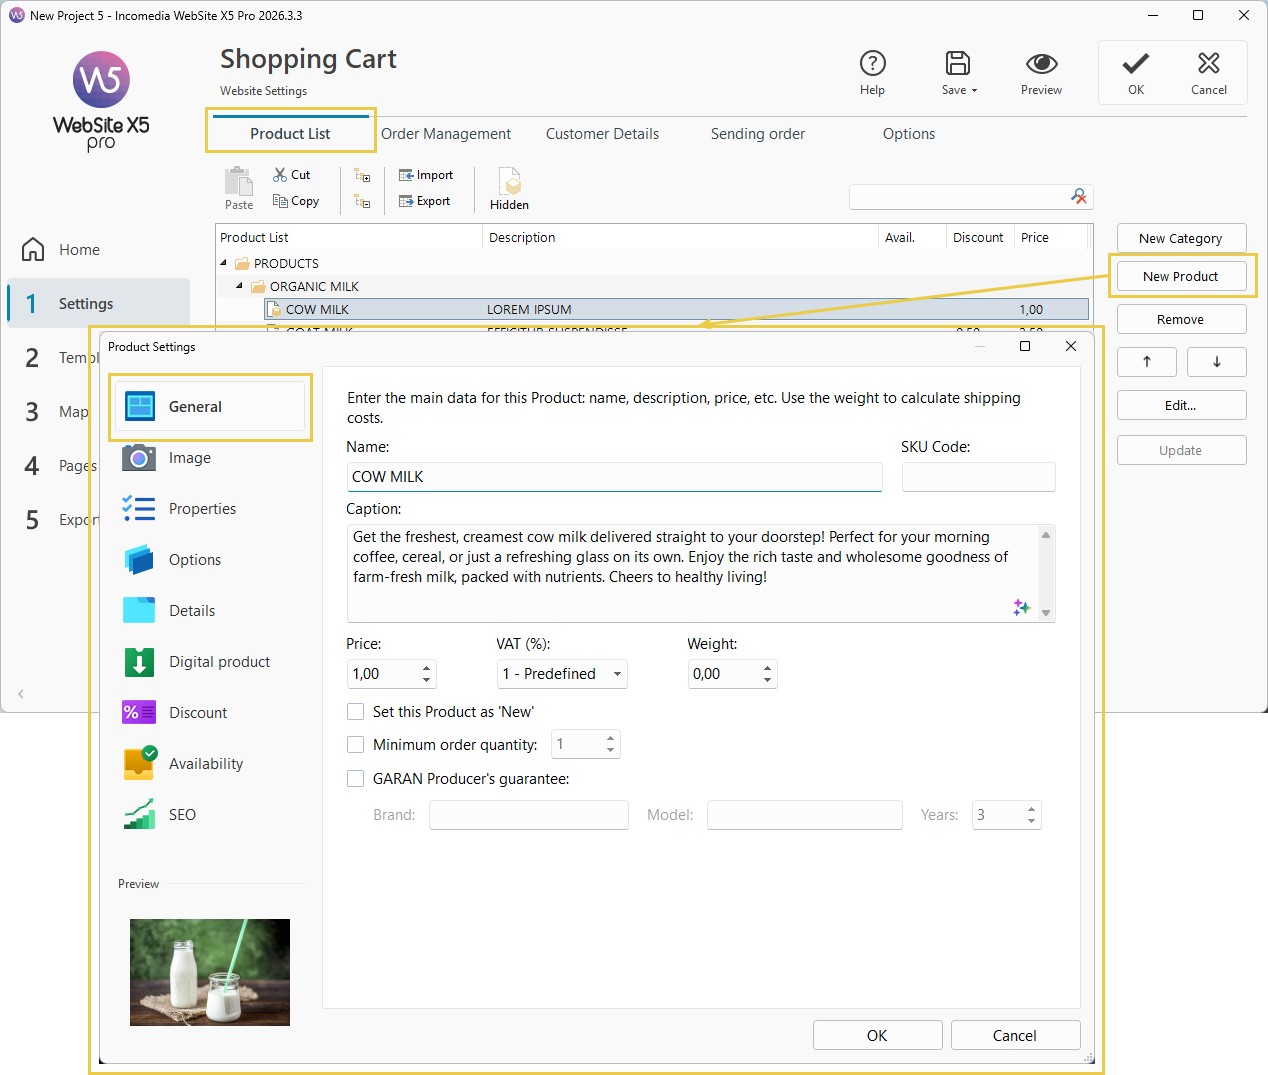
These are the main details needed to add the product to your catalog. You can complete its configuration using the other available options, such as variants, discounts, availability and presentation details, depending on the characteristics of the item you are selling.
#tip – EU GARAN label. If the manufacturer offers a free commercial guarantee of durability covering the entire product for more than two years, you can also enter the details for the EU GARAN label in the product settings: the manufacturer’s brand, the model identifier and the guarantee period. To check when to use it and how it is displayed in your store, see the guide EU GARAN label. How to display the commercial guarantee of durability in your online store?

The EU GARAN label does not replace the notice on the legal guarantee of conformity. To add this notice to your store and order confirmation, see the guide Legal guarantee of conformity. How to display the legal guarantee notice in your online store?
How to add images and videos to a product
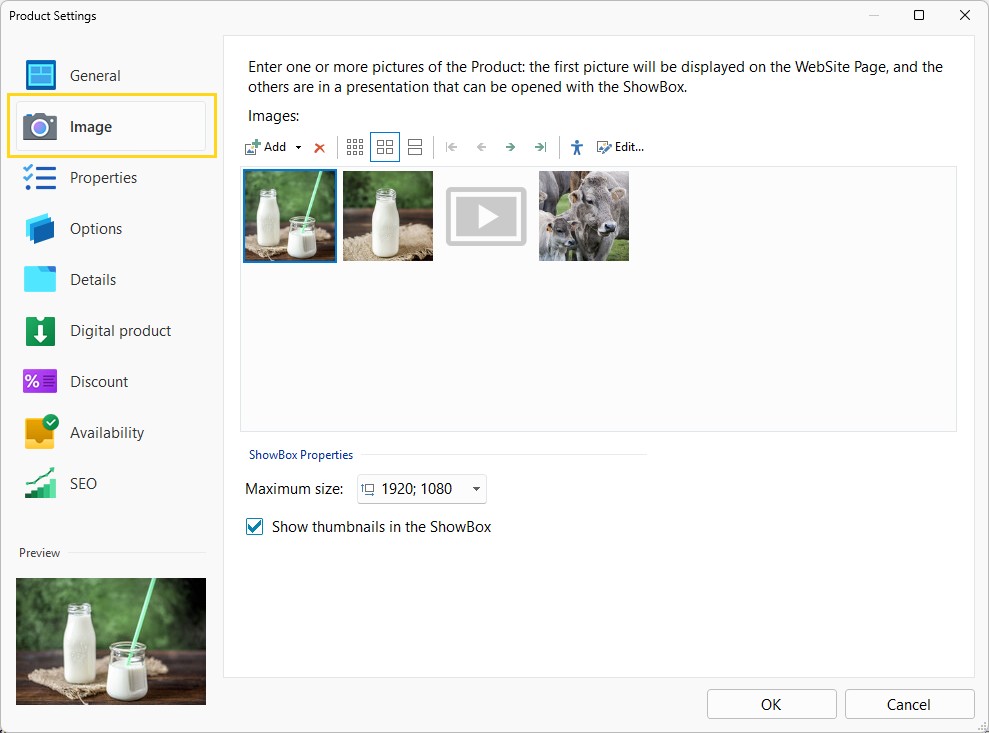
Images help customers assess a product before buying it. The first image you add plays a special role: it is displayed prominently in Product Cards and on Product Pages. The others form a ShowBox presentation and allow you to show details and different views.
- Still in the Product Settings window, open the Image section.
- Click Add and import one or more product images. You can also include videos alongside the images.
- If necessary, change the file order using the relevant controls, placing the image that best represents the product first.
- You can select an imported image, click the
 Accessibility button and decide whether to mark it as decorative or add a Title and Alternative Text (see: Image accessibility: the importance of alternative text).
 - To change the appearance of an image, select it and click Edit to open the built-in image editor.
- Set the maximum dimensions of the SlideShow window and choose whether to display thumbnails of all the available images.
- Click OK to confirm.
- Repeat the procedure for the other items.
How to hide or remove a product
If you no longer want to offer a product in your store, choose whether to keep it in the catalog for future use or delete it permanently.
- To hide it temporarily, select the product and click Hide. The item retains its settings but does not appear in the store or in the Preview. To make it visible again, select it and click Hide again.
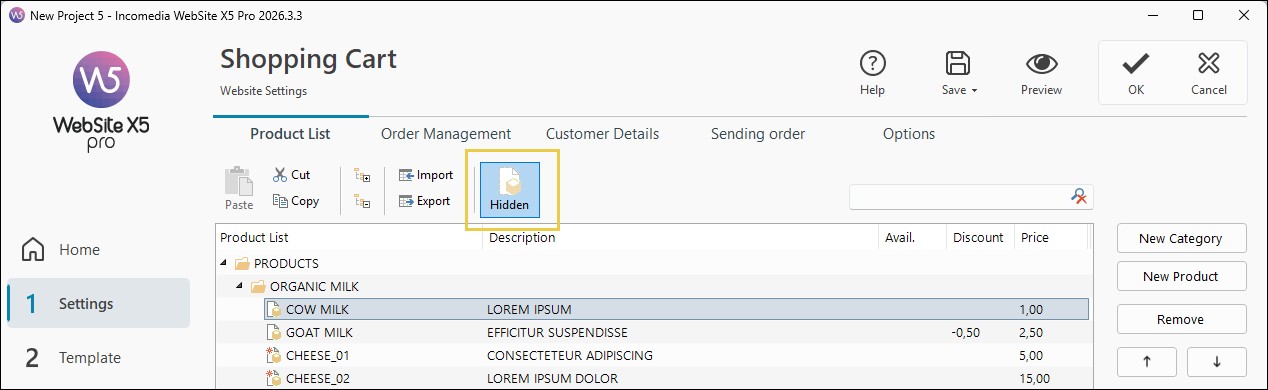
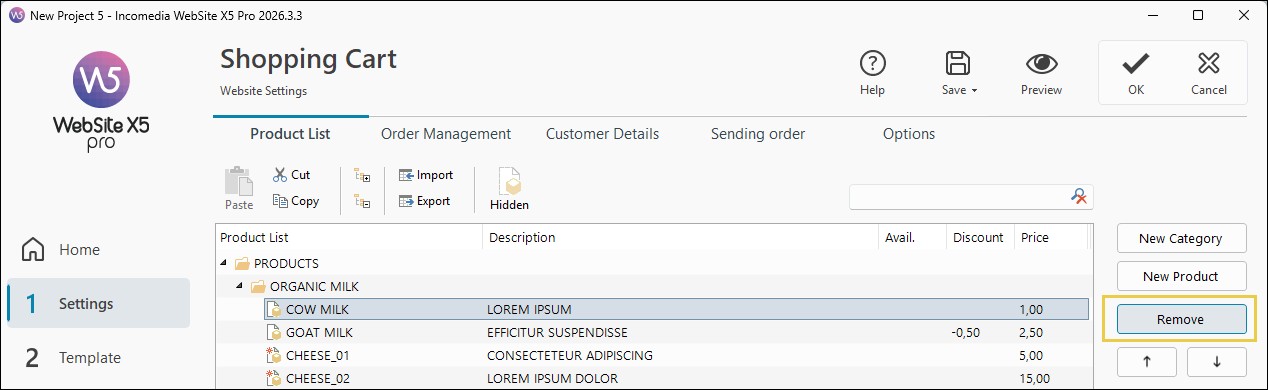
- To delete it from the catalog, select the product and click Remove.
#tip - Importing/Exporting products. The Product Catalog can be imported if it already exists in .TXT or .CSV format, or exported using theand
buttons. For more information about the Import/Export functions and how to create and manage product catalog files, see: How to import/export Shopping Cart products.
Practical tips
Before publishing your store, check the catalog from a customer’s perspective:
- make sure category names help customers find products and that each item is in the appropriate group;
- open a few Product Cards and Product Pages in the Preview to check how names, descriptions, prices and images appear;
- check that the first image clearly represents each product and that the others are in the desired order;
- make sure hidden items are not offered in the store;
- if you have configured the EU GARAN label for a product, check that the brand, model and guarantee period match the manufacturer’s documentation.